
TL:DR; The Heroku Hobby plan will be more efficient in terms of your personal ROI.
I like the simplicity of Deploying an application to Heroku. Recently I checked the Dokku (PaaS alternative).
Pay attention:
- Dokku doesn’t support Multi-host.
- Dokku doesn’t support Multitenancy. (It can, but there are better solutions for this)
This tutorial will be based on AWS, but the similar process can be done on other VPS services, for example: DigitalOcean
Setup
- Create AWS instance. Let’s assume your public ip is: 123.456.789.100
- Create DNS record in Cloudflare (or your own DNS manager)
- ssh into the new server:
ssh [email protected] - Visit https://github.com/dokku/dokku/releases and install dokku via bootstrap script as described:
wget https://raw.githubusercontent.com/dokku/dokku/v0.14.1/bootstrap.sh sudo DOKKU_TAG=v0.14.1 bash bootstrap.sh5. Create Dokku application: dokku apps:create myapp . Change myapp to your application name.
6. Set locales sudo dpkg-reconfigure locales
7. Add a swap file to avoid memory problems.
# Allocate a file for swap
sudo fallocate -l 2048m /mnt/swap_file.swap
# Change permission
sudo chmod 600 /mnt/swap_file.swap
# Format the file for swapping device
sudo mkswap /mnt/swap_file.swap
# Enable the swap
sudo swapon /mnt/swap_file.swap
Check swap configuration
sudo swapon -s
df
Mount swap on server reboot
sudo nano /etc/fstab
Add the following line and save
/mnt/swap_file.swap none swap sw 0 0
Configure Dokku
Next steps should be done from your local computer
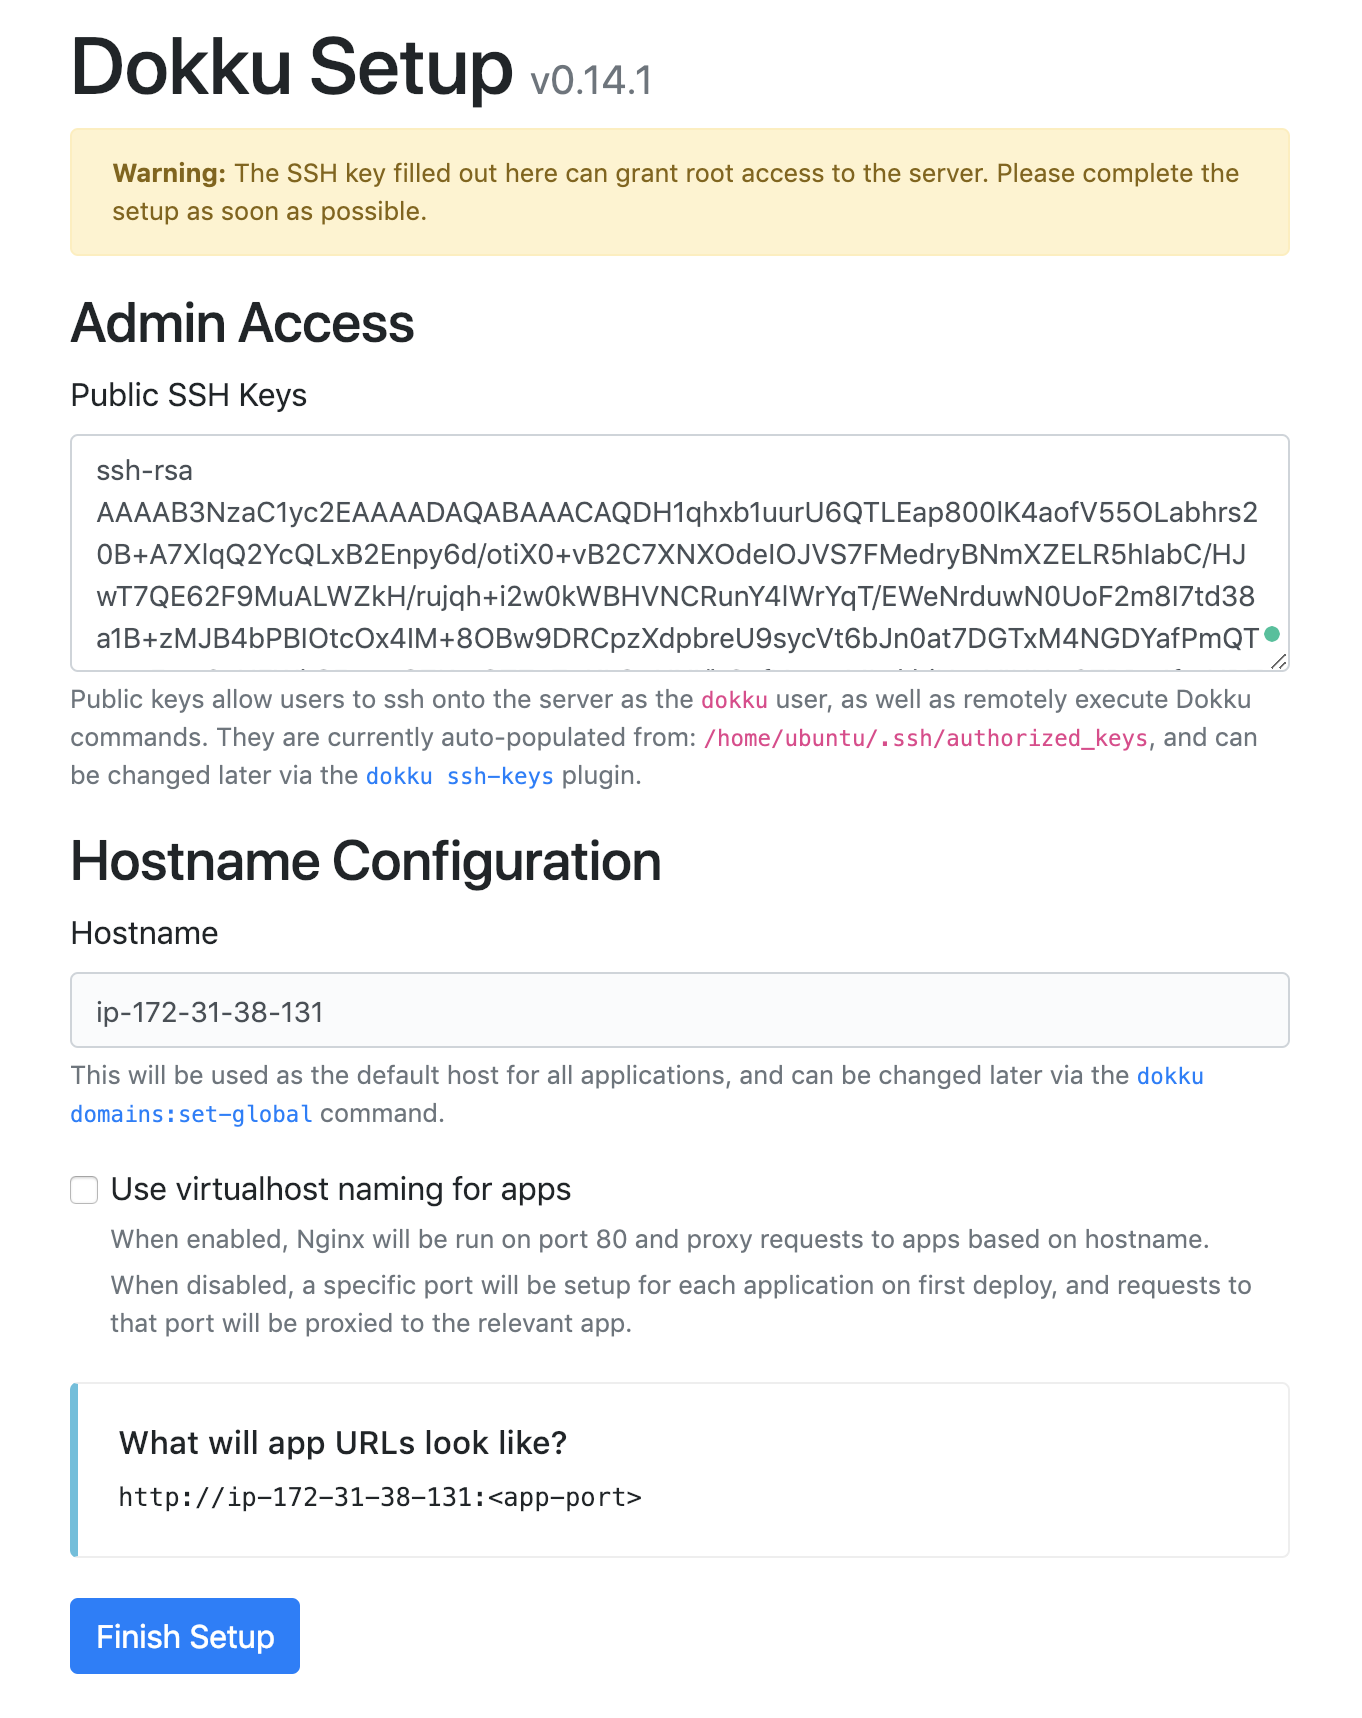
- Open your browser and visit: http://123.456.789.100
- Add your public ssh key. Copy to clipboard and paste in Dokku setup
pbcopy < ~/.ssh/id_rsa.pub - Leave other settings unchanged and press FINISH SETUP
4. Open your Rails project folder and add Dokku to your git settings, as following (change the IP and application name):
git remote add dokku [email protected]:myapp
5. Let’s deploy our application git push dokku master
If everything is configured correctly, you should get a notice similar to this

Setup SSH for easy access
- Add secret.pem file your got from AWS to
~/.ssh/ - Set read-only access:
git chmod 400 ~/.ssh/secret.pem - Add a record to
~/.ssh/config
Host my-awesome-server
  HostName 123.456.789.100
  User ubuntu Identity
  File “~/.ssh/secret.pem”
  Port 22
ForwardAgent yesNow, you can access your server via ssh my-awesome-server
Application Configuration
- SSH to your dokku server and run:
dokku config myappThis method is similar to heroku config - Add your ENV values as following:
# Set ENV
dokku config:set myapp RAILS_ENV=production
# Whenever you set or remove a config var,
# your app will be restarted, unless you use: — no-restart flag
dokku config:set — no-restart myapp RACK=production
# Get ENV
dokku config myapp
# Unset ENV
dokku config:unset myapp RAILS_ENV
Note: no need to set SECRET_KEY_BASE because it is done by buildpack
3. Setup Postgresql (dokku plugin)
sudo dokku plugin:install https://github.com/dokku/dokku-postgres.git dokku postgres:create mypg dokku postgres:link mypg myapp
If you need to import existing DB, do the following
dokku postgres:import mypg < latest.dump
4. Setup Redis (dokku plugin)
sudo dokku plugin:install https://github.com/dokku/dokku-redis.git redis
dokku redis:create myredis dokku redis:link myredis myapp
5. Dokku uses Procfile similar to Heroku
# Initialize example for Rails + Sidekiq
dokku ps:scale myapp web=1 worker=1
Procfile example
web: bundle exec passenger start -p $PORT — max-pool-size 3 worker:
bundle exec sidekiq -C config/sidekiq.yml
6. Database migration
# Manual migration
dokku run myapp rake db:migrate
If you want automatically migrate after each deploy, add app.json to the root folder of your application. See postdeploy example below:
{
  "name": "My Awesome App",
  "description": "Bring happiness to it’s users",
  "scripts": {
    "dokku": {
       "postdeploy": "bundle exec rake db:migrate"
     }
  }
}
Setup Domain
# Setup
dokku domains:add myapp mydomain.com
# Get domain information
dokku domains:report
Open your DNS provider and set the record

Visit: http://mydoman.com You should see your rails application working properly.
Setup SSL certificate using Let’s encrypt
Adding SSL certificate from https://letsencrypt.org
- Add dokku plugin
sudo dokku plugin:install https://github.com/dokku/dokku-letsencrypt.git
2. Setup SSL
dokku config:set — no-restart myapp
[email protected] dokku letsencrypt myapp
dokku letsencrypt:auto-renew myapp
# Cron job to renew certificate every 2 month
dokku letsencrypt:cron-job — add myapp
CRON Jobs with Dokku
There is no cron job using dokku. However, you can setup cron jobs on the host, and run dokku run <app> <COMMAND> to execute your task in the container.
Read more here
Example:
0 0 * * * /usr/bin/dokku — rm run MYAPP “bundle exec rake RAILS_ENV=production ‘something:doing’” >>/var/log/cron.log 2>>/var/log/cron_error.logMiscellaneous useful commands
- Run Rake tasks:
dokku run myapp rake db:migrate - Open Rails console:
dokku run myapp rails c - Tail Logs:
dokku logs myapp -t - NGINX logs
# access
dokku nginx:access-logs myapp
# errors
dokku nginx:error-logs myapp
- Restart the app:
dokku ps:restart myapp - Check docker process:
docker ps - Remove unused Dokku:
dokku cleanup
Other
- Setup all requirements on push https://github.com/crisward/dokku-require
- Faster deployment with Docker https://pawelurbanek.com/optimize-dokku-deployment-speed
- https://flynn.io Flynn is an open source platform (PaaS) for running applications in production
References:
- http://www.rubyfleebie.com/2018/12/14/how-to-use-dokku-on-digitalocean-and-deploy-rails-applications-like-a-pro/
- http://dokku.viewdocs.io/dokku~v0.14.1/deployment/application-deployment/
- https://pawelurbanek.com/rails-heroku-dokku-migration
- http://www.albertgao.xyz/2019/01/28/how-to-setup-your-own-paas-with-dokku-node-react-mongodb-nginx/